Monday, March 17, 2014

time2cre8 ... from my Bead Hoard

I know a lot of beaders, and therefore I know that a lot of us share the same habits when it comes to beads...  we hoard.  It doesn't start out as our intention (at least I don't think it does), but as we see all those beautiful little bits of glass, metal, and clay, we just can't resist them.  All we can think about is how pretty they are and all the lovely things we could make to use that beady goodness.

But then time comes into play.  There's never enough of that, it seems, so we pack those pretty beads away carefully to be used another day.  And then we see more pretty beads.  And we have to have them.  But we don't have time to use them.  And they're packed away.  And the cycle continues...

For someone like me, who's been happily beading away for about nine years now, the bead hoarding begins to reach astronomical proportions.  I resist the urge to buy new beads, no matter HOW pretty they are (we won't even talk about the gorgeous lampwork hearts I bought yesterday... ahem).  I make resolutions for myself to use beads from my "stash" rather than buying new beads, and sometimes I'll actually go to my stash and grab some beads after spending a couple of hours ogling beads online.  Sometimes.

So why all this talk of bead hoarding?  I'm throwing down a challenge to my fellow beaders -- go dive into your bead hoard, your own personal stash, and pick out some beads you've had stored away for a future project.  Choose some you've had for a long time, some that haven't seen the light of day in years.  Then make something with them and show it off!  Post pictures to your blog or your Facebook page, and tell everyone how good it feels to use some of your bead hoard.  Maybe we can all find and support each other if we tag our creations with #beadhoard.

Here's a little something to inspire you -- I just finished this bead crochet rope, which I've named  Tutku, a Turkish name that means "passion."  The rope is crocheted from cream colored pearl finish Czech seed beads that look like spun honey, and the focal beads I used for the ends of the lariat (the beads that inspired the Turkish name) are polymer clay beads made by DDee Wilder.  I've had the polymer clay beads for four or five years now, so long that I even forgot I had them until I went through my bead hoard.  I think they deserve to see the light of day, don't you?  :-)


Monday, January 27, 2014

time2cre8 ... in 2014

Well, here it is.  The new year.  Not so new any more, as it's already almost the end of January.

Did you make any resolutions?  I think I resolved not to resolve...  Last year I did pseudo-resolutions.  Things I wanted to do, jotted down in a notebook.  I got a few of them done, but not nearly as many as I wanted.  Oh well.  I had a fun year anyway.  :-)

One thing I want to do this year (and mind you, it's not a resolution) is to get more things listed in my Etsy shops.  Did you know I have THREE Etsy shops?  Sheesh.


My primary shop is time2cre8, where I have all my beady creations and beading patterns.  I can't even estimate the number of beadwoven pieces I've made over the past several months that need to be photographed and listed.  I also want to UNlist some things, pieces I made on a whim that have just sat there in my shop taking up space.  It's time for them to go.


Then I have a shop called time2split, where I began selling off some of my art supplies and some vintage stuff I've collected over the years.  I only opened that shop as a way to destash, but it's turned into quite an enterprise now.  It's stocked with different types of cardstock and art paper, as well as piles and piles of handmade envelopes (my way of working through a scrapbooking paper addiction).  Since there's still lots of destashing I need to do, I want to get more listed in that shop too.  Not a resolution, though.  :-)


Last but not least is the third shop, time2cre8too, where I have stationery items.  I started a line of stationery a few years ago that I call Captioned Critters, and I've been slowly stocking the shelves in the time2cre8too shop with mini notecards and stickers.  I also have a bunch of Alice in Wonderland things, all made from the gorgeous illustrations by Sir John Tenniel.  The plan this year is to add more critters to the mix and a bigger variety of items that feature all the quirky animals I've found.


Note that all of my shops have "time" in the name.  That's one thing that seems to be in short supply, but I'm having a blast making things.

What about you?  What do you like to do with your time?  Do you make things?  Cook?  Read?  Exercise?  Travel?

Whatever you do, I hope you're having fun!

Friday, November 01, 2013

time2cre8 ... going UnderCover

No, I'm not becoming a spy...  I've just gotten carried away creating more of my UnderCover series of bead crochet necklaces.

I made the first of these pieces early in the year, and since then I've made six or seven more.  They've been in a bunch of different colors, and a few in different lengths, but all with the thing that gives them their name:  the magnetic clasp is hidden underneath two peyote tubes that wind up looking like a pendant when the closure is worn in the front.

For some reason, I had the urge to make more of these in the past couple of weeks.  It started with that dark steel colored one; and then I saw those copper lined hex beads and thought they'd make a pretty necklace; then came the multicolor one, which is also made with metallic lined beads (this is the first I've done using more than one color); and finally, what could be prettier than matte metallic silver?


Do you do this?  Get on a roll making one thing and just keep creating variations?  I think it's fun to see just how different pieces can look when they're made in different colors.  And Miyuki helps us with this, giving us hundreds and hundreds of Delicas from which to choose!  :-) 

Monday, September 16, 2013

time2cre8 ... A Wonky Bead Lariat

If you're at all like me, you probably miss a good number of your friends' and acquaintances' posts on Facebook.  I try to keep up with them, but it's nearly impossible with the massive list of friends I have (most of whom I've never met, but we share a common art form - beadweaving).

One post that happened to catch my eye was by Kristi Bowman, the polymer clay artist behind KristiBowmanDesign on Etsy.  Kristi had created a new batch of polymer clay beads and posted pictures of several sets of them.  I think what attracted me to the post was that she had called them "wonky beads."  How could you possibly resist reading a post about wonky beads?

Her post was all about doing a Wonky Bead Blog Hop, with each participant purchasing one set of the wonky beads and using them in a project.  There were several sets of the beads available; you can see some of them on her original post.
 

I decided it would be fun to do, and today's the reveal!


As you can see, I opted to track down some of my Czech seed beads with their beautiful picasso finish to coordinate with the beads.  After finding the perfect beads in my stash, I crocheted a rope that's a blend of the three colors -- mostly taupe/brown with sprinkles of turquoise and dark red.

Head over to Kristi's blog to visit the other participants' blogs and see what they did with their wonky beads!  :-)

Tuesday, September 10, 2013

time2cre8 ... a piece of Pi

When inspiration strikes, do you follow?

I don't always, but sometimes an idea takes hold and won't let go.  Last night we were watching a movie, Life of Pi.  I hadn't read or seen much about it, other than noticing that it received some attention at the Oscars, so we didn't know what to expect.  I wound up really liking the movie, but something in the back of my mind kept saying... "What if you did something with pi?"

Actually, I already had one idea about combining Pi with beads, a couple of years ago.  The result of that idea is this Piece of Pi bracelet I made using square stitch.


Knowing that there's no real "pattern" to the number sequence in Pi, it still made me wonder what would happen if I strung beads using Pi as the stringing sequence and then crocheted them.  Hmmm.

And so it began.  My first thought was to create a bead crochet rope using black and white beads, just alternating the colors for each number.  I'd even thought out using a bead of a different color for the decimal.  And that all worked -- until I hit the first zero in the sequence.  Naturally, I chose red to represent the zeros; and I was off and counting.  Thanks to the interwebs, it was no problem finding sites about the numerical sequence in Pi, so I printed off the numbers from a site that has Pi to 10,000 digits.

After about an hour of counting and stringing, I have approximately 18' of beads on my thread.  This is Pi to 1000 digits.


As I was stringing the beads for this rope, I started thinking about other ways I could do the stringing...  I could assign a specific color to each number and string beads of all different colors.  Or, I could assign different shades of the same color (say, all shades of blue) and string a monochromatic Pi.  Just imagine the difference between stringing one bead to represent each color and stringing multiple colored beads to represent each number (for example, 3 red, 1 blue, 4 green, etc.).

I was so anxious to see how this would look that I couldn't wait to start crocheting.  I chose to use six beads around (and if you know bead crochet at all, you realize that changing the number of beads around would drastically change the look of the rope), and as the rope developed I started to see bits of what look like patterns.  Not really patterns, but it definitely looks different than a rope that's strung in truly random order.  To me, it kind of looks like birch bark.


Those strings you see at the ends of the rope aren't part of the design...  I'm just trying to figure out how I want to finish this off.  Using an invisible join, one of my favorite ways to finish bead crochet ropes, seems wrong somehow -- that would mean that the 1000th digit of pi is connected to the first digit.  Nope, can't do that.  And I don't want to hide the ends of the rope under bead caps because then all the digits wouldn't be visible.  I'm still thinking about it (any suggestions?).


***

I'm not the only one who decided to combine beads with Pi.  A friend of mine, Lidia, recently finished work on a loomed bracelet whose colors are mapped to the numbers in Pi.  One really interesting coincidence in our both coming up with Pi ideas?  We share the same birthday, February 28, so we're both PIsces.  Funny, right?  :-)

She's graciously given permission for me to post a picture of her bracelet here so you can see it.  Yes, she even says it looks a bit like bead soup; but when she wears it she knows that it's really a representation of pi and not soup at all.


Lidia's bracelet was woven on a loom (as opposed to what I do most often, off-loom weaving using peyote stitch).  She said it actually took longer for her to map out the graph than it did to do the actual looming!  I can see why...


So what now?  I think there will definitely be another version or two of pi for me.  I'm not sure when, but the idea's still churning around in my head, and I have another copy of the digits printed so I'll be all set.  Maybe this time I'll make a rope using Delicas.

Friday, August 16, 2013

time2cre8 ... Pickled Beets

I'll bet you thought I was going to say something about beads...  That's usually the case, but since we moved into our new house this year and planted a pretty good-sized garden, we've been inundated with veggies.

Specifically, zucchini the size of baseball bats, piles of green beans, a few peas (they didn't do very well), a few green peppers, loads of tomatoes, and gobs of cucumbers.  And beets.

Because everything was planted at the same time, it all ripened at the same time, and I've ventured into the world of canning -- the thought being that it would be better to start off canning stuff rather than investing a few hundred dollars in a freezer (that may come next year, though).

Just look at all these zucchini and cucumbers!


My only experience in canning foods was many many years ago, and I was a mere spectator.  Oh, I helped string and break beans, but I wasn't allowed near the canning apparatus (that was for the experts).

I did a little reading in some of the recipe books I have, and I even found a recipe on Pinterest for refrigerator pickles -- they're quite good, but because of the way they're made they only last for a couple of weeks.

When I realized the beets were ready to pull, I enlisted the help of a neighbor who does a LOT of canning.  We'd been to our neighbors' house and sampled their pickled beets, and they were delicious.  She offered up her help and her kitchen, and we drove up there with our freshly-pulled-up beets (with all but about 3" of the tops cut off and the roots intact to keep them from "bleeding out"), giant pots, vinegar, sugar, spices, and jars.

The process was relatively easy.  Even for beginners.  Because the beets are pickled, there's no need for a pressure cooker.  It's just a few steps:

1.  Clean the beets thoroughly.  Don't brush or scrub them so the skin doesn't get damaged.  Make sure to leave 2" to 3" of the tops and the entire root intact.

2.  Add beets to boiling water and boil for about 35 minutes.  They're ready when the skin starts to "slip", the sign that they can be peeled easily.

3.  Take beets out of boiling water and put into a cold water bath.  Cut off the tops and the roots, and peel them.  The peels should slide right off (although you might have to coax them with a knife).  Cut them into 1" or so chunks or into slices (we opted for chunks).

4.  In a big pot, add 2 parts vinegar, 2 parts white sugar, 1 part water, and pickling spice.  For our recipe we used 3 cups of vinegar, 1-1/2 cups of white sugar, and half a bottle of McCormick's pickling spice.  The pickling spice was poured into a coffee filter and tied up, since we didn't want to wind up with spice floating around in the liquid.  We just kind of guessed at how much liquid to make, just trying to make sure we had enough to fill all the jars so the beets were immersed in liquid.

5.  Bring all of that to a boil, then add the cut up beets.  Bring back to a boil, and boil for five minutes.  (Here they are, cooking away -- isn't that a great color?)


While all of that is going on, the jars and lids are being prepared.  The jars are already clean, so they're sitting in a pan of boiling water, tops down, to keep them hot and keep the tops of them sterile.


6.  Take a jar from the pan, and using a canning funnel, fill it to about 1/2" from the brim with beets.  Add liquid to about 1/4" from the brim, then wipe the edge of the jar to make sure it's clean.  Add the lid and the ring, then set the jar aside to cool (we set them on a towel, since we wanted them to cool evenly).

A little while later, you should hear the lids start to pop as they seal (if some don't seal, put them in the fridge and eat them within a couple of weeks -- all of ours sealed successfully).

Bada bing - bada boom -- pickled beets!  THEY'RE YUMMY!  (And they're good for you too, but mostly they're yummy.)

After the pickled beet canning, I moved the operation back home and canned some bread and butter pickles and some green beans.  The giant zucchini were peeled, seeded, and grated so they could be stored in Ziploc bags for future zucchini bread.

And soon the garden will have more veggies for us...  :-)


Saturday, August 03, 2013

time2cre8 a Patchwork Peyote Bracelet

I've lost track of how many patchwork peyote bracelets I've made.  Each one has its own personality, from the very first multicolor one (the one most reminiscent of my grandmother's quilts) to one of the most recent metallic multicolor one that I named Not Your Grandma's Patchwork.

Mamaw's Patchwork Quilt...
photographed on one of my grandmother's handmade quilts, a piece I've treasured for many many years.

The metallic delicas have always been some of my favorites, and I came up with this bracelet after playing around with some of them for another project (do you do that?  I often think of a new project while I'm in the middle of working on something.).

Not Your Grandma's Patchwork
I've been asked numerous times to publish a pattern for these, and I just keep putting it off.  But I think I'm finally about to do it!

Oddly enough, writing the pattern for one of these patchwork designs is proving more of a challenge than for some of my other designs, simply because I've never done one of these from a pattern.  So I'll be working backwards to write the pattern -- making the bracelet first and then mapping the colors.

I just received an order for one of the Not Your Grandma's Patchwork bracelets in my new OpenSky shop, so I'll have a fresh bracelet to use as the model.  If you're on OpenSky, follow me and give some love to some of my listings!  If you're not on there yet, you can click this link and sign up (there are some really cool things on the site):
http://www.opensky.com/time2cre8
:-)

Saturday, July 20, 2013

time2cre8 for the Bead Hoarders Blog Hop

I've always admitted to being a bead hoarder.  And it appears I'm not alone, as more than 100 participants signed up for Lori's Bead Hoarders Blog Hop.

As always, I started out with the best of intentions:  Use up a bunch of those beautiful beads I've collected over the past seven or eight years.  And as always, it seems, something gets in the way of my best intentions and I don't get nearly as far along as I expected.

Nevertheless, I did finish a couple of pieces and used a few beads.  The first project is a diminutive little necklace that features a pretty clay focal that's been in my stash for at least five years.  I'm embarrassed to admit that I can't remember who made this piece (so if you know, or if it was you, please leave me a comment!).  But it's a pretty embellished square in a beautiful olive tone with a hint of turquoise.  To highlight it, I decided to make an ndebele rope using colors that are found in the focal.  The rope, although twisted, also has a square shape.  I think they go together wonderfully!


The second piece I made actually serves two purposes...  Use a few beads from my stash, and finish off a UFO (UnFinished Object) from my pile of unfinished pieces.  :-)  This bead crochet rope was just screaming to have a collection of lampwork beads added to each end.  The rope is about six feet long, made from a mix of Czech glass seed beads in shades of gray and silver, so the beads I chose for the ends are in the same colors.


I think I need another blog hop challenge to get me to use up more of my bead stash!  Maybe the next time I'll get to use more -- this challenge was interrupted by a trip out of town to visit relatives.  At least that's the excuse I'm going with.  :-)

** Please visit Lori's blog to see more of the Bead Hoarders Blog Hop!.

Sunday, July 07, 2013

And After Ten Months...

Ten months?  Really?

Yes, that's how long it's been since I wrote a blog post.  And as you would imagine, a lot has happened in ten months.

  • We finished building our house and moved in.  Our first night in the new house was January 1, which somehow seems fitting.  There's still a lot to be done, as we have trim to put up, a shower to tile, windows and doors to polyurethane, another deck to build, and a massive amount of yardwork to do.   But it's awesome being here!  :-)
  • I opened another Etsy shop, so my Captioned Critters and other stationery goodies will have a place to live.  I missed the critters.  The new shop is http://www.etsy.com/shop/time2cre8too
  • Countless new pieces of beadwoven jewelry have been created and listed, and quite a few sold, in my Etsy shop http://www.etsy.com/shop/time2cre8
  • Lots of new peyote and bead crochet patterns have been published and/or are in the works.  I now have help from Alicia Hartley, who's doing a lot of beadweaving so I can get new designs out faster.
I'm sure there's more.  But as usual, once I sit down to write about it I can't think of anything.  I really ought to take notes...

One new thing that's coming up:  I've signed up to participate in the Bead Hoarders Blog Hop, which I'm using as incentive to incorporate some of the beautiful art beads I've amassed into some new pieces.  One of the requirements of participating is that I have to post pictures on my blog on July 20.  So at the very least there will be two posts this month in this sorely neglected blog!  LOL


My plan (which is more of a dream, really) is to make more frequent, more interesting posts here.  We'll see if I can follow through.

Saturday, September 15, 2012

Beads of Clay Design Challenge

As a Design Partner with the Beads of Clay Professional Artists Team, I recently received an awesome package in the mail, filled with handmade beads and fiber wire made by several members of the Beads of Clay team.


The goodies are from Yarn Sweet Yarn, Jeraluna Designs, Kristi Bowman Design, Starry Road Studio, Marla's Mud, and Beads, Birds and Bones.

Once I had all these delicious looking supplies in hand, I went to review the requirements for the challenge -- and I panicked!  The initial directive was that we were to use ALL of the components to create just two pieces:  a necklace or bracelet, and a pair of earrings.  I don't typically sketch my designs ahead of time, but instead I tend to design in my head and as I go.  After I've spent time pondering a particular design, I usually have a good idea of how I want to assemble it and how it's going to look.  But this one was a complete puzzler!


The fiber wire is gorgeous and intriguing, but I knew that once I had figured out what I wanted to do with it I wouldn't really have an opportunity to change my mind.  It's very flexible, and the colors are beautiful, and I figured I was going to have to cut it into pieces to do something with it.  Since I'm not a magician, there would be no way for me to undo those cuts... The other challenge for me is one of my favorite components in the batch -- the long twisted tube by Marla James.  Its scale is so much different than the rest of the beads that I just couldn't figure out how I was going to fit it into one design and have the result be cohesive.

So I arranged.  And rearranged.  And thought.  And rearranged some more.  Thought some more.  Looked through my beads to see what I could use with these components.  All the while, I was following along with the discussions among the other designers, all of whom seemed to be having the same dilemma with being able to use all of the components to make just two pieces.  I had just about settled on making a freeform cuff, but with all of these components it would wind up being a HUGE cuff.

Now I have to tell you that I failed in the challenge to use all of the components.  I just couldn't find a way to make them all work in a single piece.  I suppose if I'd ventured into the land of wire wrapping, chains, or leather cording, I could have figured out a way to join them all together.  The biggest challenge to me, since I don't "string" beads or work with wire very much, was to use these components with some style of beadweaving.  I do have leather cording, wire, yarn, and all sorts of other supplies (what can I say -- I've never met a supply I didn't like), but I really wanted to do something that involved beadweaving, since that's my favorite type of work.

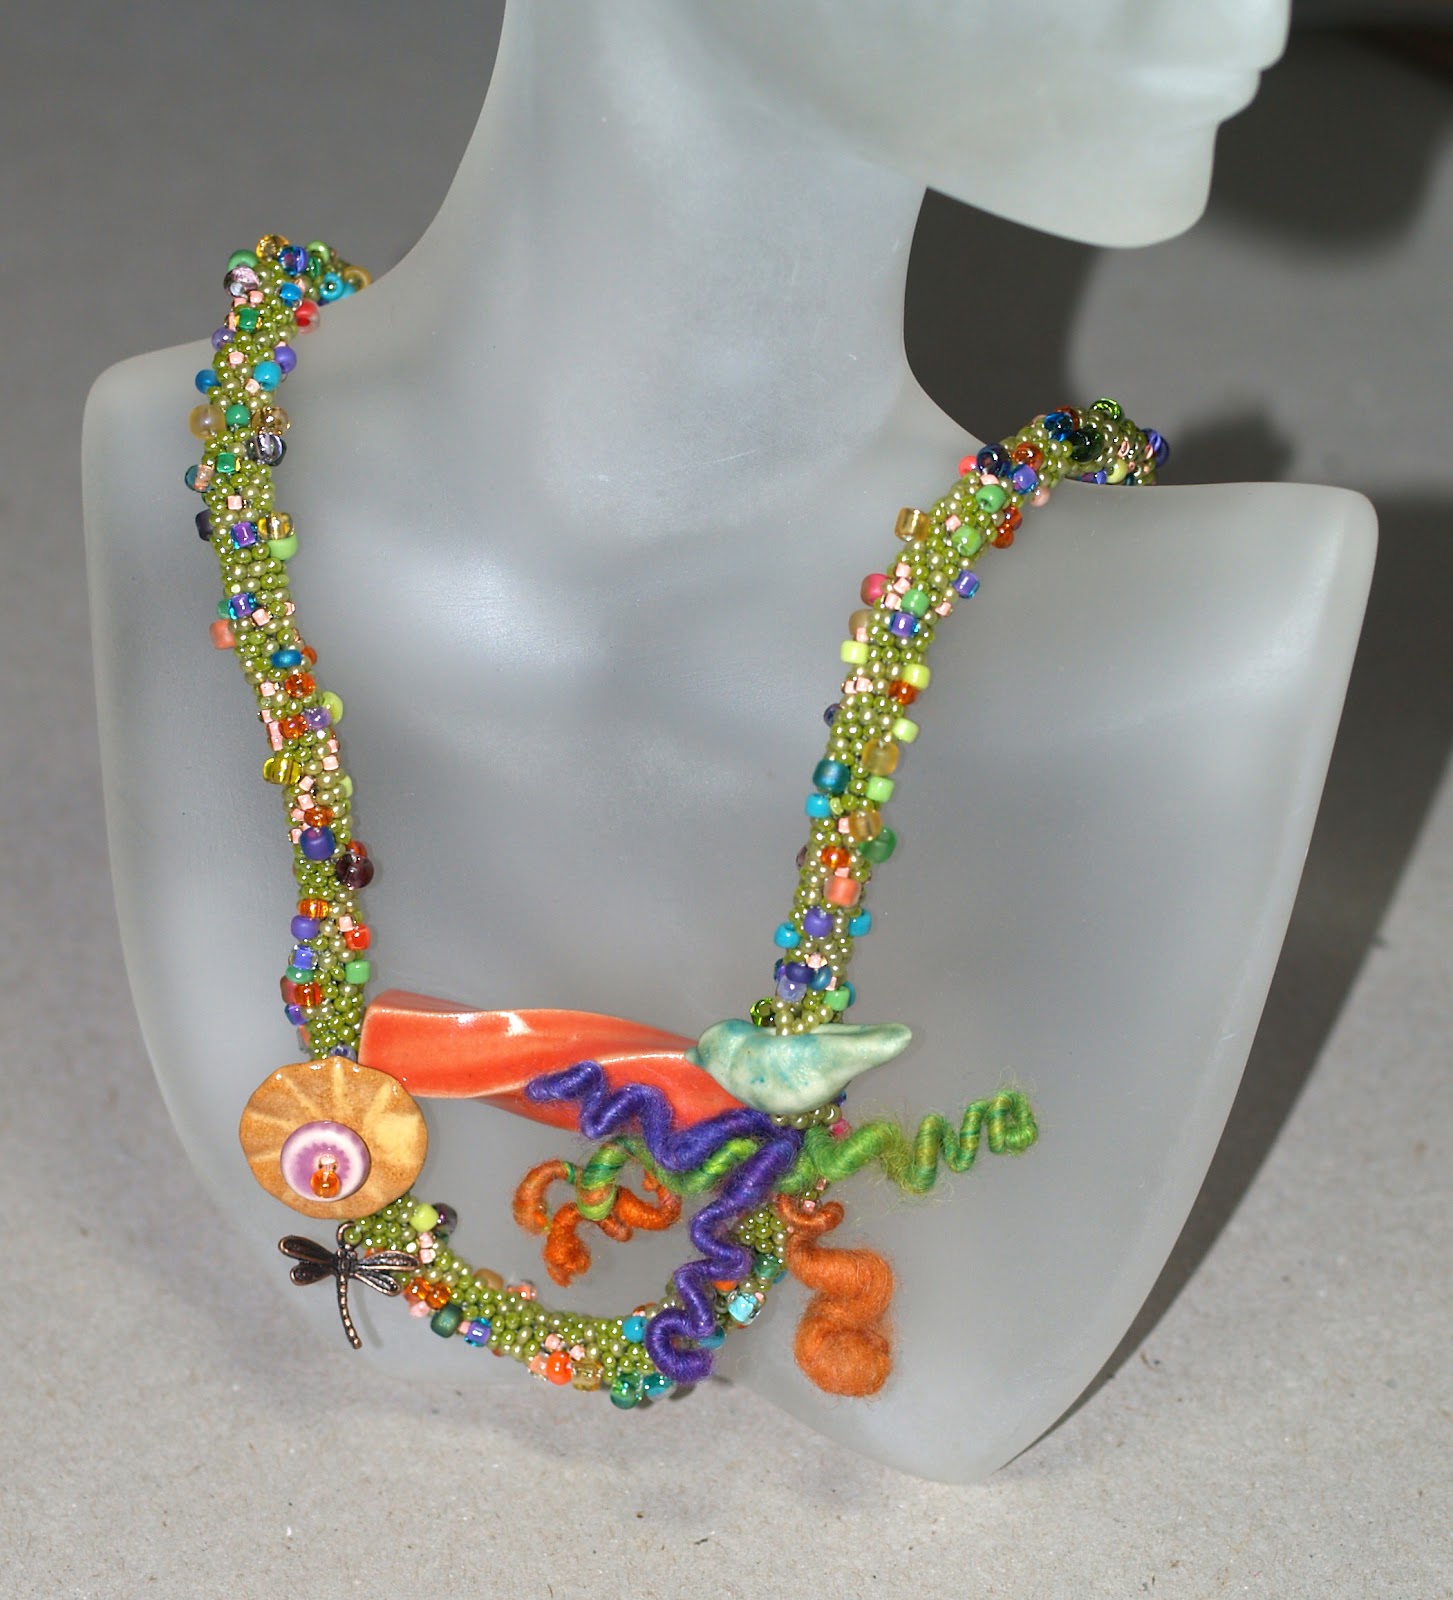
The piece I made is a necklace that I'm calling Bloom.  It's a bead crochet rope that incorporates the beautiful colors of the challenge components and a few of the pieces (I'm still considering a freeform cuff of some type to use the remainder of the pieces).


I'm thoroughly impressed by my fellow designers, all of whom managed to meet the challenge of using all of their components.  Please visit their blogs to check out their beautiful creations:

Cilla Watkins - www.tellyourgirlfriends.com
Kari Asbury - http://hippiechickdesign.blogspot.com 

Shannon Chomanczuk - http://formysweetdaughter.blogspot.co.uk/
Lesley Watt - http://thegossipinggoddess.blogspot.co.uk/ 

Now I'm off to do some shopping...  not for beads (for a change), but for deck railing.  :-)

Saturday, August 11, 2012

Dulcinea... Bead Soup Sweetness

This post is going to appear a little out of order.  You see, I decided a few months ago to participate in the 6th Bead Soup Blog Party, hosted by Lori Anderson.  I probably should have known better, but I always think I can do more, in less time, than I actually can (sometimes my Superwoman cape gets twisted around).  But there I was, signed up to participate, and then I started to panic a little that I wouldn't be able to complete anything with my "soup."

I did finish something, though -- not something elaborate, by any means, but it does meet the requirements of using the focal and the clasp I received in my soup from Penney Klaproth (more about the soup later).  Because I wound up waiting until the last possible minute to work on my piece, there's only one...  this sweet little necklace that I named Dulcinea.


I mentioned before that I was required to use the focal and the clasp (and you'll see later that there were LOTS of other beads, including a huge bag of seed beads and bugle beads that weren't even part of the soup!), but as soon as I saw the clasp I knew that it was going to wind up being part of the focal -- this little swirly copper loop is just too pretty to sit at the back of someone's neck.  So I chose to use it to suspend the little stone donut.  The necklace itself is an ndebele rope I made using beads from my own stash:  pretty bright copper lined seed beads that coordinate perfectly with the copper pieces Penney sent me.
 
Want to see the "soup" I received?  Here it is!  It has a great collection of metal and natural beads that will eventually be used in some project.  In fact, I have them sitting on my bead board now, while I ponder what I can do with them.  I'm particularly intrigued by the little glass plugs, the ones nearest the hand in the photo below.  Their colors are wonderful, and I'm thinking I might actually try something with wire...
 
 
Now I have some blog hopping to do...  And I'd like to invite you to hop along with me.  You can visit http://www.prettythingsblog.com/2012/08/6th-bead-soup-blog-party-2nd-reveal.html for a list of all the Reveal #2 participants.  Don't forget to visit my swap partner's blog, Faerie Acres!

Tuesday, August 07, 2012

Need a Vacation?

Do you need a vacation? I can honestly say I don't "need" one, but they sure can be fun.  I've been to quite a few places over the years, on all sorts of vacations:  the coast of Florida to sit on the beach and play in the ocean with my friends; to Venice for sightseeing; to Sweden for my friend's wedding (in August, which was much nicer weather than when I visited her in November!); to the Cayman Islands for some of the most wonderful SCUBA diving anywhere; to Sedona, Arizona, for hiking and sightseeing, including a trip to the Grand Canyon (which is where I took the picture you see here); to Bonaire, for more SCUBA diving of a completely different sort than what I experienced in Cayman; and even on a Caribbean cruise!  There are more places on the list, but those are some of the standouts.

Our most recent trips were to Hilton Head, somewhere I never would have thought of going, but a place that turned out to be pretty relaxing and enjoyable.  We went in the off season, so we just tooled around the island, visited some galleries and museums, and ate.  Lots of seafood.  It was wonderful!

So why am I talking about vacation?  Well, honestly it's for a contest... 

This is my version of a perfect 24 hours on a Spanish Island. This post was written as an entry for 24 hours on The Balearics contest sponsored by OnTheBeach.com. The prize is £500 in Amazon Vouchers and the contest runs until August 17, 2012. Please visit BeersandBeans.com to learn more about the contest and how you can also enter.

I've never been to a Spanish island, and I must admit that I didn't know anything about the Balearics, other than the names of some of the islands, before I saw the post on BearsandBeans.  The names of the four largest islands are Majorca, Minorca, Ibiza, and Formentera.  A quick Google search for information and images demonstrates just how easy it is to learn about this island chain.

So let's see...  a perfect 24 hours on The Balearics would begin, of course, with a trip to the beach.  It really doesn't matter when the plane lands on Majorca.  It's an absolute necessity for me to get my toes into the sand and to feel the salt air rolling in off the ocean.  Since these islands purport to have 300 days of sun during the year, it's a pretty safe bet that that first foray onto the beach would be wonderful.  I could spend hours on the beach, especially if there are seashells to be found, but my husband would soon be clamoring to do something else...

The something else would probably be exploring.  Rather than driving around, we'd probably choose one of the island on-and-off tours that hits all the high spots and still gives you time the stop and visit anything that's particularly intriguing.  It looks as if there's no shortage of sights, either!  With beautiful scenery, mountains, Stone Age ruins, Gothic cathedrals, and villages all over the island, it's a pretty safe bet that we'll find lots of places to take pictures.  I always have at least one camera with me, and sometimes as many as two or three (especially after having our new digital video camera break on the first day of our vacation in Venice!), so the drive would take a long time.  I've been known to return from a vacation with more than 800 photos.

I'd have to be able to spend at least some time on or in the water, so I think we'd probably sign up for a catamaran cruise and snorkeling trip.  Although I've been a SCUBA diver for years, snorkeling is a nice, relaxing way to see some reefs and fish without having to haul all that heavy equipment around.

If we're not too tired from the cruise and snorkeling trip, we'd head out for the Majorca evening tour:  horseback riding and dinner!  Rancho Grande is located at the north coast of Majorca and has a 1.5 hour horseback tour followed by a barbecue dinner.  Yum!

Next on the agenda is a trip to one of the other islands, Minorca.  A lot of people will like Majorca, which apparently has more clubs, restaurants, and bars; but my husband and I are much more in tune with the laid back vacations where we can just look at sights and visit historical areas.  From what I've read, I think we'd take a ferry to travel from the larger of the islands to Minorca.  I believe my husband would like this island more, not only because it's less crowded but also because it supposedly has an almost constant breeze and is a bit cooler than Majorca.

I haven't kept track of the time spent, but I'm pretty sure that at this point we'd be pooped and ready for a good night's sleep.  We might stop at one of the local bars or restaurants for a beer or a glass of wine, but not too much -- with all the things to do and see in The Balearics, we're going to want to get an early start on the next 24 hours!

Nope, I don't "need" a vacation.  But reading all the articles I found and looking at the pictures makes me want one!  :-)



Sunday, July 29, 2012

Here Comes the Bride...

I always thought June was the month for weddings.  But I've been busy working on some custom orders for three different brides, all of whom are getting married in early August.  It was a race against the clock for me to get all of these finished and sent off to the respective brides, but I managed to do it (even while I was busy during the day working on the fireplace in our new house).

In every case, I was asked to create one of my designs using custom colors.  The first bride ordered my Simply Stripes design in yellow and gray (I love this color combination!).

The beads used in this set are lovely frosty looking pale gray with bright silver-lined yellow.


The next order was for some custom color versions of my "Knot, Ready for Prime Time" design.  The bride asked for chocolate and taupe, and after sending several options for the beads to use she settled on a beautiful transparent chocolate brown with a matte metallic pale taupe.  She also requested a bracelet for her future mother-in-law, something that would go with a navy dress; so I used these silver-lined dark sapphire beads and paired them with galvanized silver.  These are beautiful color combos, so I'm going to be offering them as made-to-order pieces in my Etsy shop.  :-)

And finally, I was asked to make custom color versions of my Damask design using beads in the birthstone color for each bridesmaid and for the flower girl in this wedding.  For the flower girl, I adapted the design to make a narrower bracelet so it wouldn't overpower her tiny wrist.  Each bracelet was finished off with a button or two for the closure, so every one looks a bit different.  The months represented here are January (garnet with black), February (amethyst with orange), March (aquamarine with silver), June (pearl with orange), September (the one for the flower girl, sapphire and gray), and two Decembers (turquoise with coral and blue zircon with pearl).


It was really exciting to be able to work with all these brides to create something special for them.  The process involved lots of messages back and forth, with lots of pictures also going back and forth for the color choices, but I've heard from all three of the brides and they're all thrilled with their bracelets.

Now it's time to get to work on a couple more custom orders...  not for brides this time, so I'm not racing against the clock.

Oh, and the fireplace is finished!  Now we have to do the final work on retouching the finish on the beams and making sure the floor is smooth and level so the hardwood flooring can be installed on Tuesday.  Want to see pictures of the house?
Check out my Facebook photo album, building the house:

Wednesday, July 11, 2012

Never Too Busy To Bead

I think beads must be good for my mental health.  (And for those of you who know me personally, stop snickering.)

It's been as busy as can be around here for the past few weeks, but I've still managed to fit in a good amount of beading.  And that's a good thing, because I have so many beads just sitting there in their bins, waiting to be combined into something special.  In between working on the house, going out of town, picking out and ordering all the interior doors for the house, having house guests, going over the cabinet design for the house with the local cabinetmaker, visiting the North Carolina Arboretum, laying out the cultured stone for the fireplace, hanging out with friends in town, mowing the fledgling yard at the new house, working on custom orders for a couple of brides, and working on the house some more (!), I've actually managed to get quite a lot of beadweaving done.  Not many pictures, unfortunately, but that's a whole other matter.

I've been a member of an Etsy team, the Etsy BeadWeavers, almost since it was formed several years ago.  Every month they have a challenge, based on a theme chosen by one of the members.  Most of the time I see the theme and figure I don't have enough time to focus on doing something for it, or I just don't feel particularly inspired.  For some reason, though, the July theme of "Tangerine Tango" immediately made me think of making a freeform peyote cuff.  I haven't made one in awhile (more than a year!), so it was fun to dig through all my orange beads to come up with a collection to make this piece:  Tangerine and Mango Tango 

By the way, voting for the July theme is now open on the Etsy BeadWeavers blog.


As is the case more times than I can recount, one beadwoven piece inspires another... and another...  and sometimes another.  Over the course of a week, I managed to create FOUR freeform peyote cuffs.  Only one other has been listed in my Etsy shop:  Mountain Sky.  The other two are awaiting photographs (along with a whole pile of other finished pieces that haven't had their pictures taken yet!).


Even with all this stuff going on, and me running around like a nut half the time, I thought it would be fun to sign up for a bead exchange.  Lori Anderson is hosting a Bead Soup Blog Party, so I joined in.  I haven't received my bead soup yet from my partner, but it should be on its way.  And that's a good thing, because my "Reveal Date" is August 11.  That means I have to receive the beads and figure out what to make with them...  and then actually make it!...  and get it photographed before that date.  Whew.  Nothing like a little pressure.  You can start blog hopping early to see some of the mixes sent and received by the other participants (there are 400 of us!).

And now...  it's time to go work on the house!  We're about halfway finished with putting up the cultured stone on the front of the fireplace, and we're hoping to have that project finished by Sunday so we can have the flooring people install the 2400 square feet of hickory flooring.  Fingers crossed.  :-)

Wednesday, May 30, 2012

A Change in Pattern

After a few years of selling patterns for my peyote designs on Etsy, I've finally decided to change my pricing policy to what it seems that the majority of pattern sellers do:  THE 3 FOR 2 PROGRAM.

So after a morning of editing, all 60 of the peyote patterns I currently offer in my Etsy shop are now available under the new pricing structure.

This change doesn't affect the pricing of the patterns offered here on my blog (there's a tab at the top of the page that will take you to the patterns), where the prices are already lower (and where the patterns are available for immediate download).

Wonder what else I can do today that's productive.

Oh yeah.


We have a house to build!

The next "pattern" I'll be working on is laying out the cultured stone for the fireplace.  I have 270 square feet of wall to cover, and about a ton of stone to move.  Beads are much lighter.  :-)

Sunday, May 06, 2012

What Happened to April?

The days, weeks, and months are just flying by.  At least that's how it seems around here.  The house is consuming lots and lots of our time, even though it feels like progress has stalled a bit while we wait for the wooden beams to be finished and installed.

So what happened to April?  Well, income taxes took up a lot of time in the first couple of weeks.   Of course I waited until almost the last minute to do everything.  Every year I tell myself I'm going to be more prepared and not have to sit there crunching numbers in a spreadsheet for hours on end; and every year I sit there crunching numbers in a spreadsheet for hours on end.

There were some beading projects that I finished during the month, including one very special project for a lovely Frenchman who wanted something for his girlfriend's birthday.  He had definite ideas about the design and the colors, so it was a real pleasure to create this set of ropes for him.  They won't be presented to the recipient for another few days, and he's promised to let me know how she likes her gift.  For my part, I was thrilled to meet someone who put so much thought into a gift -- and he did all this more than a month before her birthday!


That's not the only beading project I finished during the month.  Because I was so busy with working on the house, I found it easier to work on bead crochet projects than anything else.  Once the beads are strung, a task which can take anywhere from 30 minutes up to a couple of hours, I can start and stop multiple times during the making of a rope without having to worry about where I am in a pattern.

Here are a few of the pieces I finished during the month (I finished several more, but some are still waiting for their pictures to be taken).

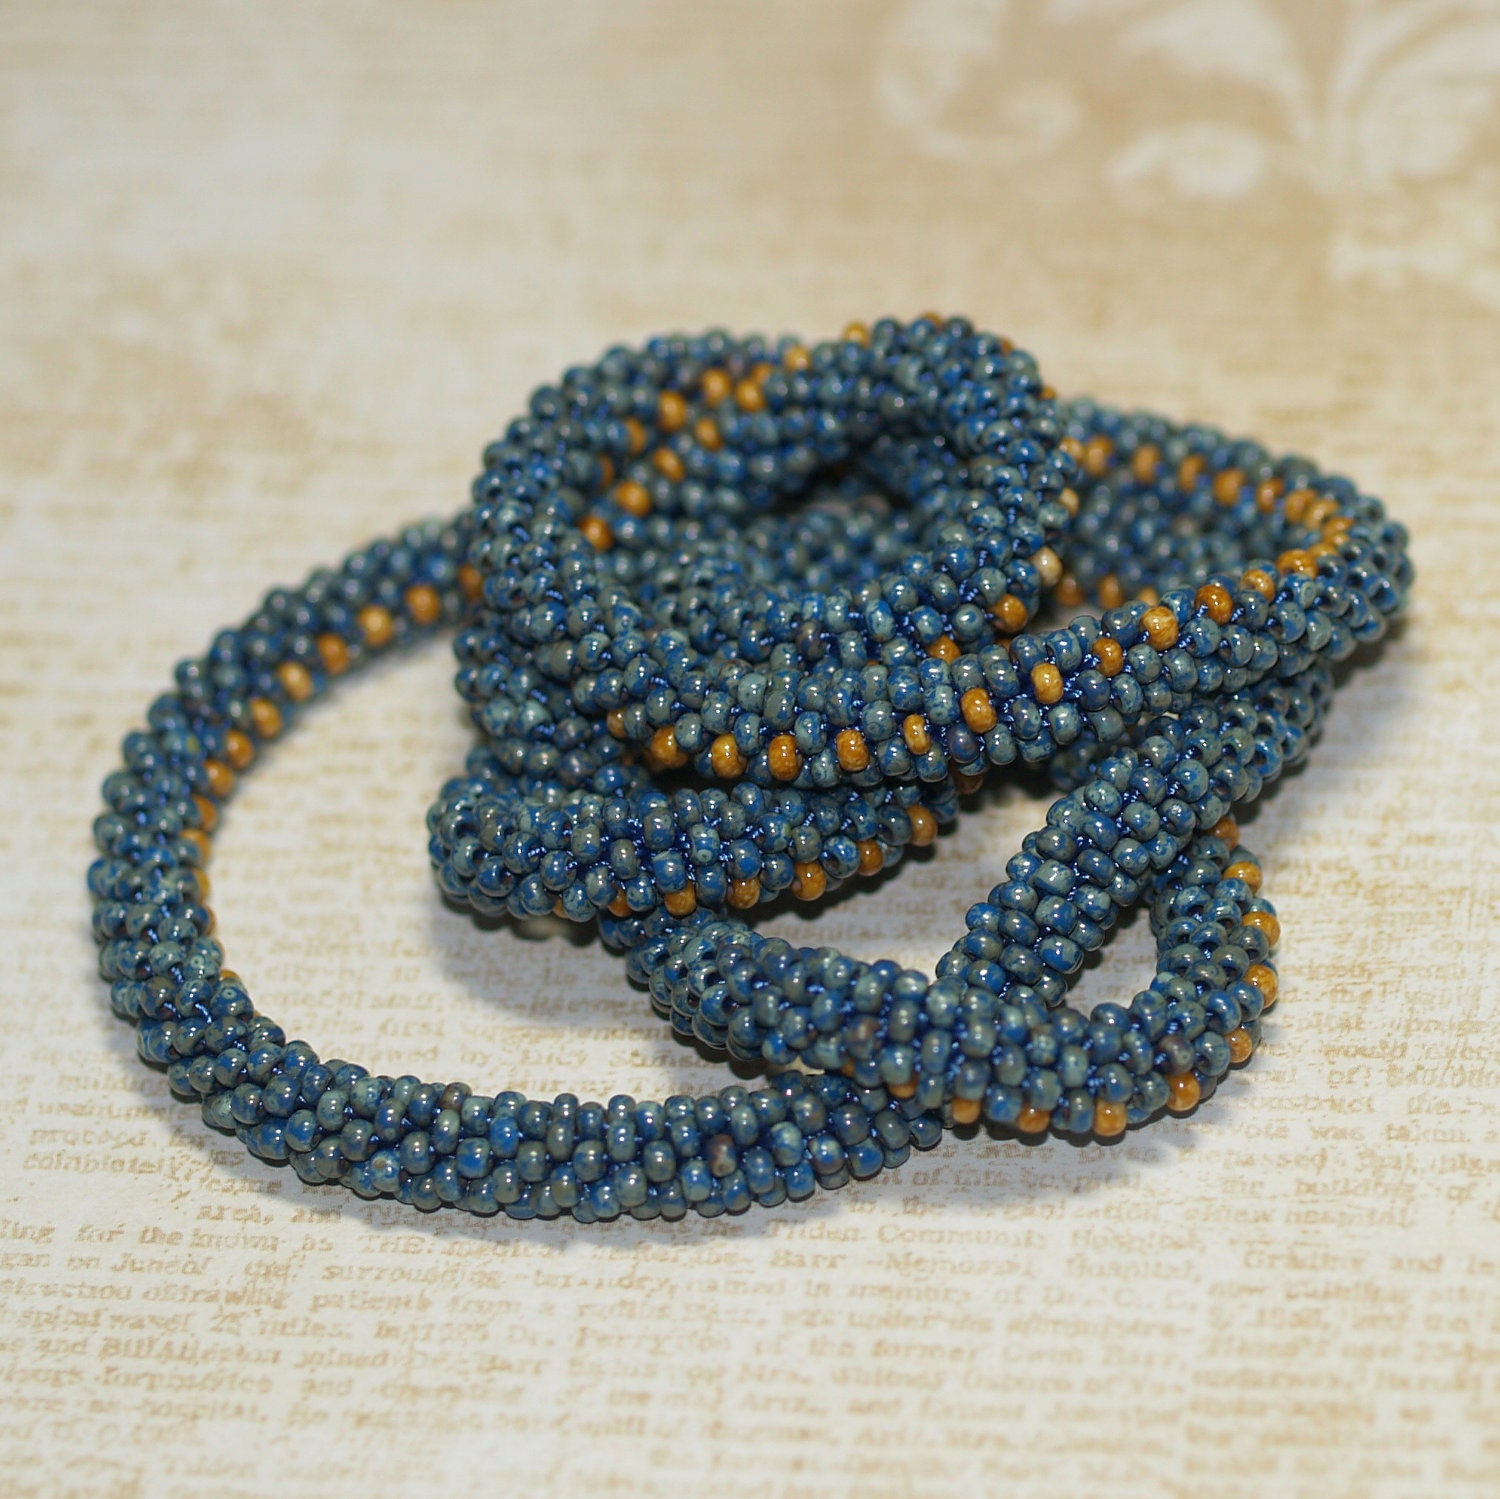
 Yes, this one was named with the Elton John song running through my mind.  I designed this one with picasso finish Czech glass beads (size 8/0) in denim blue and caramel, with the caramel beads placed to resemble stitches.  It's crocheted on royal blue silk thread, so it has a wonderful drape and heft.

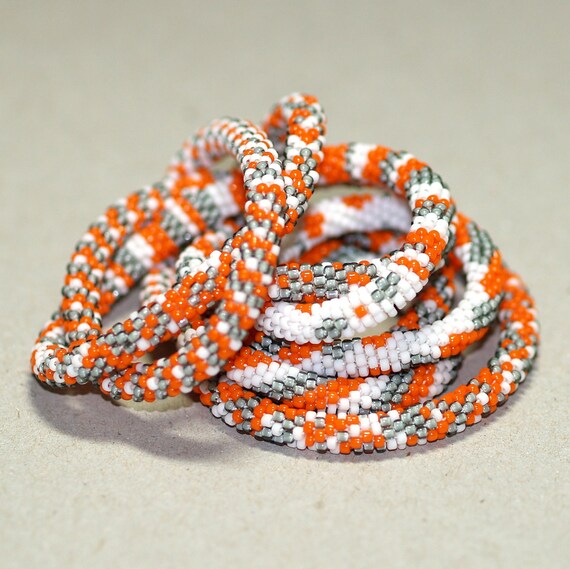
I really like finding interesting and/or descriptive names for some of my pieces, and the name Braith means "speckled" in Welsh.  Created from matte opaque white, shiny opaque orange, and white-lined gray seed beads (size 11/0), part of the rope is speckled -- just a blend of the three types of beads -- and part of the rope is a series of patterns.  I just love these colors together, don't you?

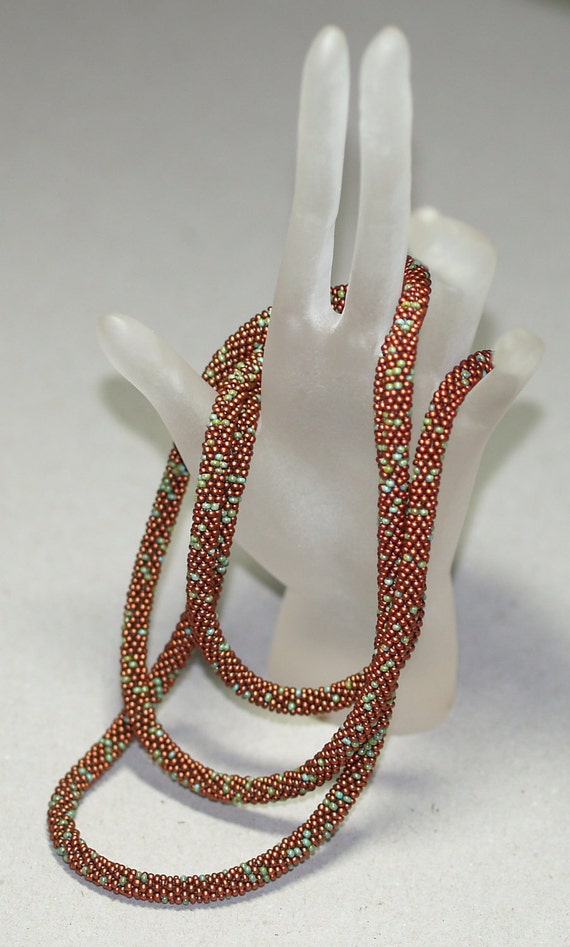
The name of this piece is kind of a play on words...  "patina" is a "fine coating of oxide on the surface of a metal," and I think it's illustrated here by the combination of turquoise/olive beads mixed in with the dark silky copper beads.  Rather than name this piece "patina," though, I opted to give it the name of one of my favorite high school teachers.


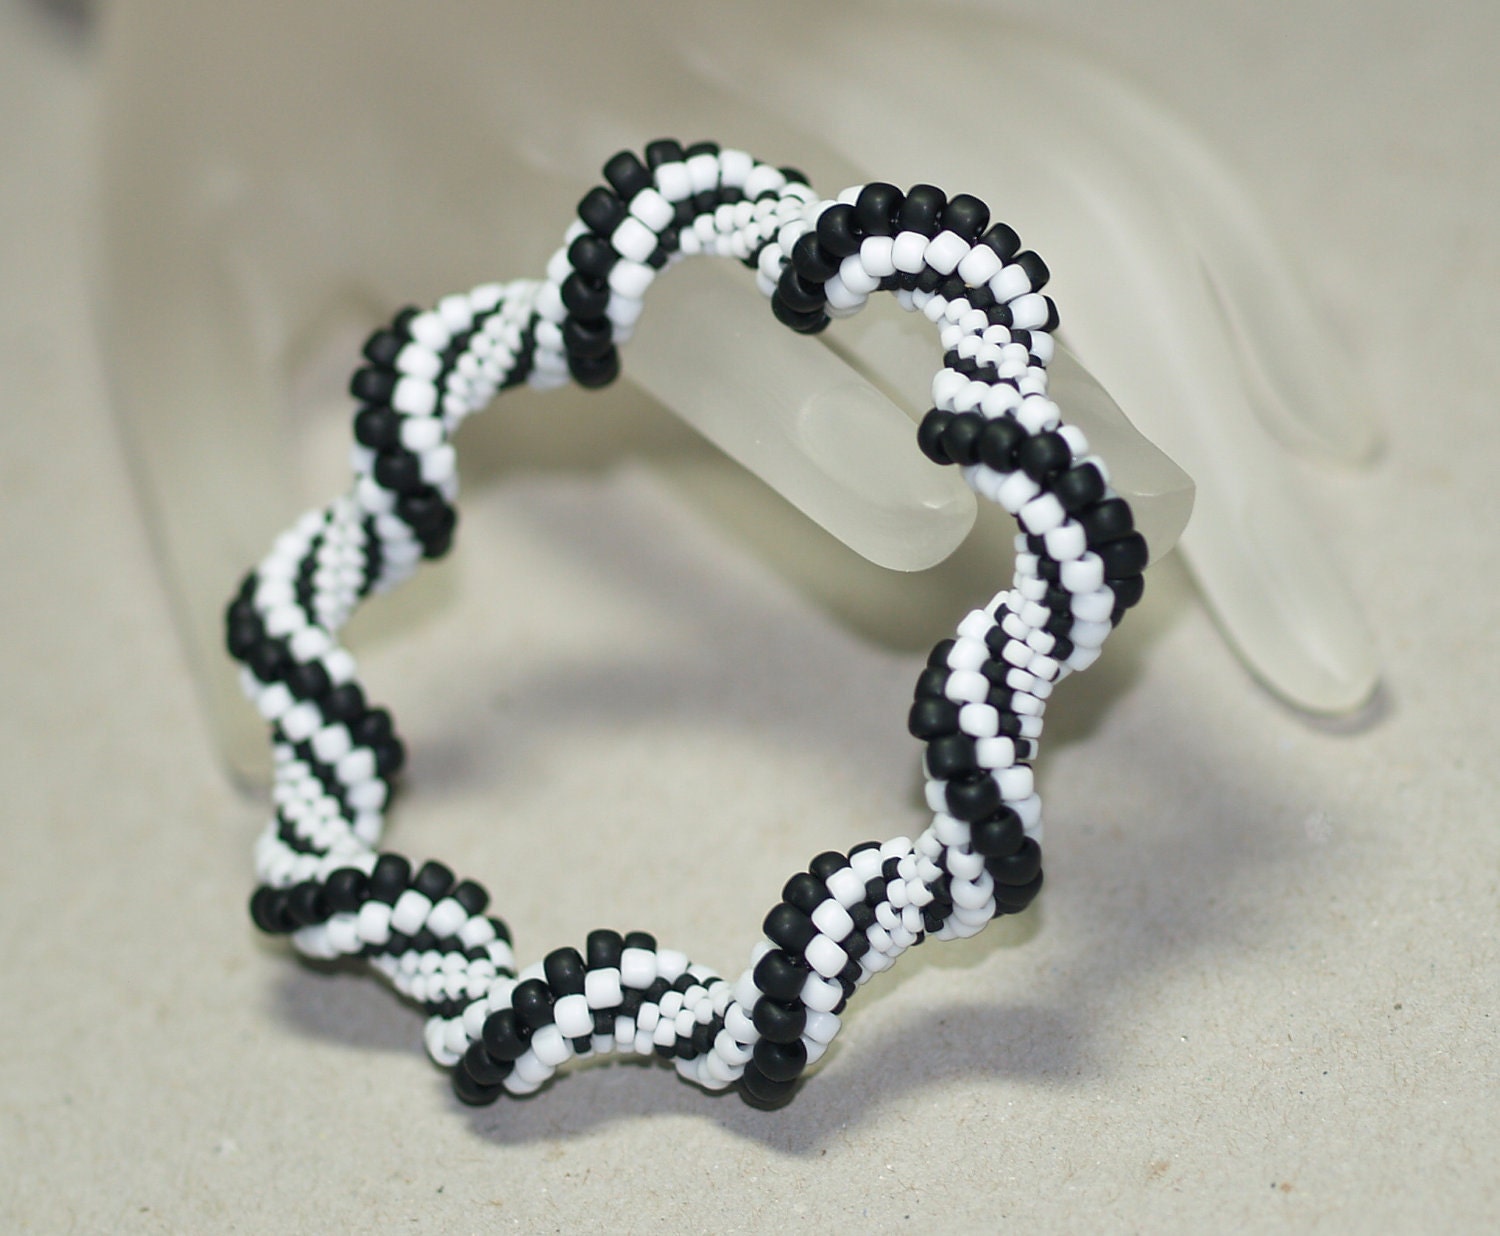
It's been awhile since I made one of these twisted bead crochet bracelets, but I decided to have some fun.  This one is made in my own favorite colors using matte finish black and white beads of varying sizes.  Looking a bit like a Cellini spiral, it's really fun to watch the spirals develop as I crochet -- the result of using beads in three different sizes.

I took a break from working on the house today, having spent eight hours spreading mulch yesterday.  Crocheting beads is soooooooo much easier than spreading mulch!  :-)

Sunday, March 25, 2012

My First Choker!

Really? My first choker? With all the beadweaving I've done in the past few years, I'm actually surprised myself that I haven't made a choker. I've made pendants that are on wire or chain chokers, but never a beadwoven one.

Until now.

I recently had a special request from a customer who wanted a choker to match the Rastafarian Topography cuff.

After we talked for a bit about size and color placement, I created a whole new design meant to coordinate with the original design, pulled out beads in the same colors as the cuff, and started beading.


In order to make sure the choker would fit properly, I made it slightly smaller than the customer's neck measurement and used a length of copper chain and a lobster clasp that will allow her to adjust it to a comfortable length. No one wants a choker that's too loose -- or worse yet, too tight!


And just to fill out the ensemble, I decided to make a little pair of earrings to go with the cuff and choker.


The customer has already received her matched Rasta set and says she loves them... a good thing, since she's planning to wear them for a very special occasion - her daughter's wedding!

:-)

Saturday, March 10, 2012

And Suddenly It's March!

I knew this was going to be a busy year. The housebuilding project continues, and although it's no surprise that it's time consuming, it is a surprise that I barely manage to fit in anything else. In past building projects, I've been less concerned with the decision making about design because we were just building spec houses and weren't planning to live in them. When you're going to live in a house, though, it seems like the choices take more time and more thought.

Case in point: Flooring. We were quite proud of ourselves last year when we went to the Asheville Hardwood Center and picked out flooring. We chose #2 hickory in 3", 4", and 5" widths (I really like the random widths), and the only choice that remained seemed to be whether we would install and finish it ourselves (a daunting task, with 2400 square feet of floor to cover!) or have it done by them. After the house progressed further, we started to question our choice: Is #2 hickory, which is really knotty, going to look too "busy" for the space? We have one giant space that's living room, dining room, and kitchen combined, with no walls, and we feared it would just be too much.

So off we went last month to track down something a little calmer. First we went to a local flooring place, where we found some prefinished engineered maple flooring that we both kind of liked. The price was a little less than the #2 hickory, so that was nice; but the flooring was only 1/2" thick and we had planned on using 3/4" (not a big deal to some, but it changes the stair riser height at the top step).

Not completely satisfied with that find, we decided to try Lumber Liquidators. There we found some prefinished maple with just a clear coat, and it was even less expensive; and the good news is that it was 3/4" thick solid hardwood. Looks like we're on the right track, right? We even asked the sales clerk to haul out a box so we could see the board lengths and get an idea of how well the boards would fit together. The maple solved the "busy" problem because it's very plain, with almost no knots in it and very little grain pattern.

Just for kicks and grins, we decided to head back to the Asheville Hardwood Center to see if they had any prefinished flooring. After looking around for a bit, the sales guy told us he had some prefinished 3/4" hickory, 5" wide, that was discounted because they had a limited quantity. What?!? That sounds perfect! We looked at the display in the store and decided we couldn't pass it up; so we ordered it. It was delivered to the house about a month later (we asked them to hold it while the drywallers were working), and just last week we opened some of the boxes to look at it.

Argh! The pieces of flooring in the boxes we opened (about ten boxes, so we'd have a good sampling) were almost all in the 12-18" range! That's going to look like CRAP. Out of all the boxes we opened there were only four or five pieces that were 30" or longer. So we called the sales guy back and told him the problem. The good news is that he came and looked at the flooring, completely agreed with us that it wasn't acceptable, and then sent the truck to come pick it all up. That's some great customer service.

But now we're back to not having flooring. One more trip... back to Asheville Hardwood Center (because the sales guy told us that he could give us a good price on some select hickory), and I think we've FINALLY chosen what we're going to use! Select hickory, 4" wide, unfinished (they'll install, sand, and finish with three coats of polyurethane). Whew.


That flooring adventure is just ONE of the things that's taken a ton of time. Add to that the selection of paint color (who knew there are so many shades of offwhite!!!), buying a paint sprayer (and then having to take it back to get a new one because the first one didn't work!), learning to operate the paint sprayer, trying to figure out how to build the bookcase that will double as the stair rail, working on deck railing designs (we've already gone through about ten iterations of railing design, and we might have actually figured that out now), finding tile for the showers... it seems endless. It's fun. But it seems endless.

So in between all of those house things, I did manage to get a little beading done. After hours and hours of work, I finished this piece, Brushed Gold. It's a custom bead crochet rope made from more than 10,000 teeny tiny size 15/0 Czech glass beads with a 24k gold finish. It's soooooooo slinky! I'm not sure I'd tackle a project like this again, but it was kind of interesting to work with the tiny beads.


And more recently, I finished a bead crochet bracelet, Shinju Sage. The faux pearls are so pretty, and it's really fun to string a bunch of different sizes and shapes and then see what develops as I crochet.


Now it's time to go do some more painting. We're about halfway finished with the walls and ceilings in the house, and we've gone through 25 gallons of primer so far... (we finally did select a color: Vintage).